Step 1: Open the settings on your SharePoint site
- Begin by navigating to any SharePoint Online site.
- In the upper right corner of the page, locate and select the Settings
 icon.
icon. - From the drop-down menu, choose Add an app.


Step 2: Access the SharePoint Store
- At the top of the page, navigate to the SharePoint Store.
- The SharePoint Store provides access to all available Accelerator 365 apps.

Step 3: Find an Accelerator 365 app
- In the search bar, type Accelerator.
- Then, select the specific Accelerator 365 app that you wish to install.

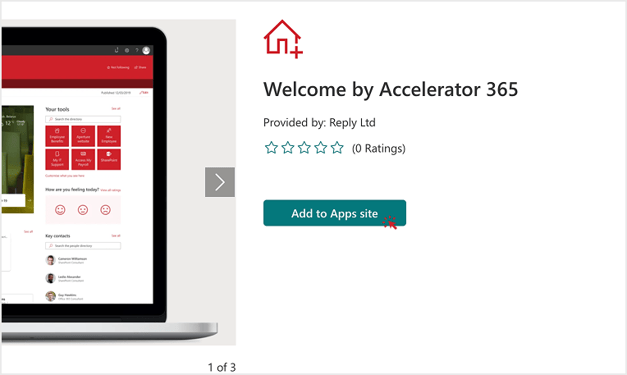
Step 4: Adding an app
- On the app's page, select the Add to Apps site button to start the installation process.
- At this point, a pop-up will appear with an option to choose where to add the app. You can either select to:
- Only enable this app - Give site owners the option to manually add the app later.
- Enable this app and add it to all sites - Add the app to all sites by default.
- Select your preferred option to proceed with adding the app.

Note: Once the app is added, you may see a message indicating that further permissions approval is required. This is a necessary step for some Accelerator 365 apps that integrate with other Microsoft 365 services.
For further instructions on approving API permissions, check out our dedicated guide.

Step 5: Verify the installation status
- To confirm that the app has been installed successfully, follow the on-screen alert to the Manage apps page.
- On the Manage apps page, you will be able to locate the installed Accelerator 365 app and view further details.


Congratulations! You have now successfully installed an Accelerator 365 app from the SharePoint Store.